Ingredients
- 300g Molino Bongermino Di Grano Tenero Dolci Type 0
- 1/2 tsp fine salt
- 1/4 tsp vanilla powder
- 225g butter at room temperature
- 200g castor sugar
- 1 tsp Fiori di Sicilia Essential Oil or Aroma Panettone
- 65g candied orange, citron or rainbow mix
- 60g chopped dried cranberries (you could also use cherries or golden sultanas)
- For adorning the cookies
- 200g white chocolate
- 50g sliced almonds, lightly toasted
- 30g candied orange, citron or rainbow mix


Panettone Style Cookies
Making a panettone just before Christmas, when time is disappearing quicker than the evening sun, can seem like an indulgent project.
However, if you love the taste of panettone and want to bake something everyone will enjoy, these cookies are something you’ll definitely want to "accept".
They’re easy to make, the dough can be prepared ahead of time, and you’ll always find someone eager to help decorate them—with the irresistible lure of melted chocolate and a little creative bedazzling!
You can make cookies in any size that takes your fancy. At home, we’ve made bite-sized ones, about the size of a 50p coin, which were great for nibbles when entertaining, and larger, regular-sized ones like those in the photo—perfect for a relaxing treat with a mug of mulled cider.
When cutting the dough, aim for uniform thickness (I used a ruler!) to ensure everything bakes evenly.
This recipe makes around 24 larger cookies or approximately 40 smaller ones.
Method
- Sift the flour, vanilla powder and salt into a mixing bowl and put aside for later.
- Using the beater attachment on a mixer or using a dough whisk in a mixing bowl, mix the sugar and butter together until light and fluffy, add the Fiori Di Sicilia Essential Oil or Aroma Panettone and mix until distributed.
- Fold in the dry ingredients and keep going until the dough becomes homogeneous.
- Add the Candied Orange, Citron or Rainbow Mix, and the dried cranberries and make sure they are evenly distributed.
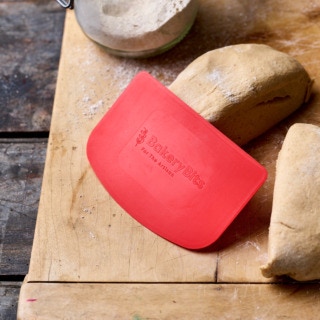
- Turn out the dough onto your kitchen top and bring it together. Using a dough scraper cut the dough in half (if making regular sized cookies or into four if making small bite sized cookies), roll each of the dough pieces into a 25cm long sausage shape. Place each dough sausage onto baking paper and wrap them tightly and store in the fridge if baking later on or in the next day or two, or in the freezer if baking at a later point.
- Make sure the dough has chilled in the fridge for at least two hours before baking.
- Once ready to bake turn on the oven to 180°C and take the dough out of the fridge (if it's stored in the freezer take it out to thaw for a half hour before you turn the oven on) and let it rest on the kitchen top for 10 mins to make cutting easier.
- Remove the dough from the baking paper and line one or two baking sheets with baking paper (you can use the baking paper that the dough is wrapped in). Take a ruler and cut discs of dough that are 1.25 cm thick. Place the discs onto the baking sheet (lined with baking paper) and make sure they have enough room to spread out a little.
- Bake for about 15 minutes but keep an eye on them after 10 mins as every oven differs, you can turn them 180° half way through baking to ensure an even bake. Once they look golden brown and look like they are dry on top, take them out of the oven and slide onto a cooling rack and let them cool.
- To finish off the cookies melt the chocolate in a mixing bowl placed over a pan of hot water. Once the chocolate has melted, take the cookies and dip them into the chocolate so that you cover half of the cookie. Place the dipped cookies onto baking paper and bedazzle them with some more candied peel and some sliced almonds. Don't dip all of the cookies before adorning them as the chocolate can set quickly in a cool kitchen (I try to do a few at a time).


